Here We Go!...
Alright everyone.... so I decided to let everyone see my progress on our newest Block of the Month called Conestoga Crossing. This is my first blog, and also my first "quilt along" so feel free to leave me comments (encouragements and criticism) and let me know how I'm doing!

As with any new project, the first step is always to read through all the great info in the pattern packet provided..... HOLY MOLY! I can't wait to get started on these blocks, but I couldn't help but be drawn in by all the history behind them! What a life these pioneers had....... but I'll let you read about it yourself.... on to the pattern.
The pattern itself is not in color, but there are handy photo printed pages of the fabrics and fabric numbers displayed. Each block piece is labeled with a letter that corresponds to that month's fabric. I found this to be a bit of a tedious task to keep figuring out which fabric was what, so I opted for coloring the pieces in my pattern with colored pencils. This helped me to keep the pieces straight visually. I am a picture person, so this really helped me for quick referencing. You could also label your fabrics each month or write yourself some kind of reference in your pattern. However you go about this, I highly recommend some kind of visual reference.... This will help save time on figuring it all out every time you sit down to cut/sew!
Another time saving tip I have is to invest in one of these ANGLE GUIDES for your machine.

What one of these handy dandy things will do is allow you to piece all of your triangles, flying geese etc. WITHOUT taking time to draw the line!! This has changed my piecing life.... seriously!
After reading through your pattern and setting up your own visual reference, the next thing you absolutely HAVE TO DO is establish a consistent 1/4" seam. There are a TON of pieces in this quilt so making sure each one will fit is essential.... Alrighty! I can't wait to get cutting!
The pattern itself is not in color, but there are handy photo printed pages of the fabrics and fabric numbers displayed. Each block piece is labeled with a letter that corresponds to that month's fabric. I found this to be a bit of a tedious task to keep figuring out which fabric was what, so I opted for coloring the pieces in my pattern with colored pencils. This helped me to keep the pieces straight visually. I am a picture person, so this really helped me for quick referencing. You could also label your fabrics each month or write yourself some kind of reference in your pattern. However you go about this, I highly recommend some kind of visual reference.... This will help save time on figuring it all out every time you sit down to cut/sew!
Another time saving tip I have is to invest in one of these ANGLE GUIDES for your machine.

After reading through your pattern and setting up your own visual reference, the next thing you absolutely HAVE TO DO is establish a consistent 1/4" seam. There are a TON of pieces in this quilt so making sure each one will fit is essential.... Alrighty! I can't wait to get cutting!
Something extra...
If you just can not live without drawing lines, here is a little something extra that I have been doing since I started piecing quilts. In a lot of traditional piecing methods (such as what we are using for this quilt), each time you sew an angle unit (flying geese, square in a square etc.) you lay a square on top, sew the angle, then cut off the extra from the back:
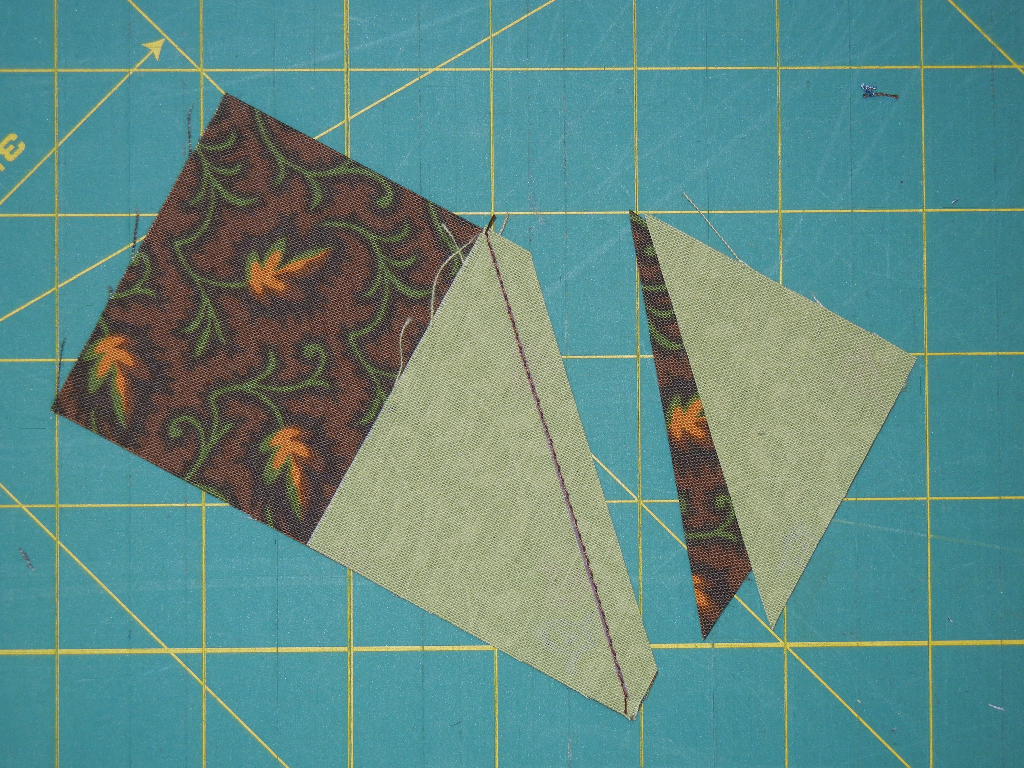
Instead of throwing these away, I decided to start sewing them together and using them for other projects, but seriously, who likes piecing those tiny triangles together??? Yeah, not me..... so, instead of trimming it right away, try drawing an additional line, 1/2" from your original line and sew that one too.


This way, after trimming you are left with an already pieced half square triangle!

Someday these will be something great.....LOL! But seriously, hang in there with me and I will include some ideas as we go on how to use these! Many coasters, potholders, pillow cases, etc. have resulted from these.... I promise!

Well that wraps up the intro..... Let's get started with these blocks!!
Great tips!
ReplyDeletethank you... glad you enjoyed it!
DeleteThis comment has been removed by the author.
ReplyDelete