
blocks to make: 1 (plus 2 baskets)
number of pieces: 57 (plus 58)
Waste HST's to collect: 8 (plus 10)
There have been several blocks now that I start to write about and I REALLY want to say that it's
my favorite, but then I think of another block and think, well that wouldn't be fair to that block since I really loved that one too! Point is, I have many favorites in this quilt, but I think this one was my favorite to put together! I mean, the colors.... right?!
This month I got to tap in to my last bundle of fabrics.... yay! Isn't it pretty?! There's just something about taking apart a really pretty bundle of fabric isn't there?!


snap your fingers and turn them into these units.

The only one that's a little different is this one. Just pretend it's just like all the other flying geese units and you'll be fine. Diagonally piece your squares to the top same as always.


Don't forget these guys..... Hey, did you ever notice that if you look at these sideways they sorta look like spikey fists or something? I dunno, I really gotta lay off the cartoons... Lol


Arrangement on these is whatever I feel like doing at the moment.... Hourglasses are fun, chevrons too.... pinwheels are always a good option also since you can press all the seams the same direction.
While my brain is hurting, I'll just chuck these into a basket somewhere to use later.
When my brain comes back (or when I need them for something) I'll pull out four.
I like to make sure I have at least 4 that are the same, but that's not super important.

The set uses 12 WHST's. When assembled, they should measure 3" square (or so)
Next, I'll add some borders:

Cut (8) 1.5 x 3" rectangles from your coordinating scraps and
(8) 1.5" x 5" rectangles to add to your four patches.
Can you guess what they will be yet?? There's a set of four....

Next, cut (4) backing squares measuring 5" square and
(8) squares of cotton batting 5" square. I like to double up on the batting for a little extra umph.
Yes, these are the same size as your little finished units. That's ok. You can make them larger if you like, but you'd end up trimming them down in the end anyway.


Use a pencil or screw driver, or some other fancy tool to push out your corners.


here's the opening.... If it didn't lay so neatly (which happens a lot) Go back with a needle and whip stitch it closed.... or not.... up to you! This one turned out pretty good... It think it knew it would be on camera!


Cute, right?!
I use these for gifts quite a bit. Makes for a quick and easy housewarming, or hostess gift, or to put around the house!
DISCLAIMER: these are not water proof.... They are really absorbent, but the bottoms will be damp. I would not use them on a piece of furniture that will stain from water rings. Use only on surfaces that are not old wood finishing.
You could add a layer of vinyl or plastic, to make them more water proof, but I'm not using them on anything antique so... there you go.

I expect there to be no shortage of coasters after this month!
😏😏😏
There have been several blocks now that I start to write about and I REALLY want to say that it's
my favorite, but then I think of another block and think, well that wouldn't be fair to that block since I really loved that one too! Point is, I have many favorites in this quilt, but I think this one was my favorite to put together! I mean, the colors.... right?!
This month I got to tap in to my last bundle of fabrics.... yay! Isn't it pretty?! There's just something about taking apart a really pretty bundle of fabric isn't there?!

So here's your pieces this month....

snap your fingers and turn them into these units.

The only one that's a little different is this one. Just pretend it's just like all the other flying geese units and you'll be fine. Diagonally piece your squares to the top same as always.

Assemble in to rows and voila! I'm serious. I LOVED this block. It was a nice easy break in the middle of lots of tricky blocks!
Don't forget these guys..... Hey, did you ever notice that if you look at these sideways they sorta look like spikey fists or something? I dunno, I really gotta lay off the cartoons... Lol

total pieces sewn this month: 115
total pieces in the quilt so far: 804
total waste HST's: 118 (minus the 12 you just used, right!)
So that was fast....
What else should we do this month?? I thought I'd take a minute to share something I like to do with my WHST's. A while back we talked about secondary projects. Sometimes, my brain just hurts too much and I don't really feel like having a secondary project going.... (**GASP**)
Shocking, I know...
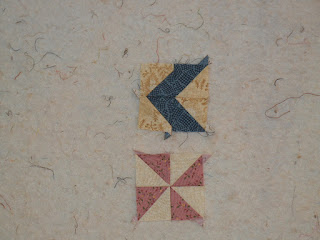
Since I have a bunch of WHST's lying around, this is usually the time I will start putting them together into little four patch blocks like these:

Arrangement on these is whatever I feel like doing at the moment.... Hourglasses are fun, chevrons too.... pinwheels are always a good option also since you can press all the seams the same direction.

When my brain comes back (or when I need them for something) I'll pull out four.
I like to make sure I have at least 4 that are the same, but that's not super important.

The set uses 12 WHST's. When assembled, they should measure 3" square (or so)
Next, I'll add some borders:

Cut (8) 1.5 x 3" rectangles from your coordinating scraps and
(8) 1.5" x 5" rectangles to add to your four patches.
Can you guess what they will be yet?? There's a set of four....

Next, cut (4) backing squares measuring 5" square and
(8) squares of cotton batting 5" square. I like to double up on the batting for a little extra umph.
Yes, these are the same size as your little finished units. That's ok. You can make them larger if you like, but you'd end up trimming them down in the end anyway.
Layer your four units as follows:
Two batting squares
One backing square on top of the batting...... facing up
One pieced WHST unit...... facing DOWN (right sides together on top of the batting)

Starting in the MIDDLE of one of the sides, stitch all the way around using a 1/4 inch seam allowance and leave a small opening. Be sure to back-stitch your start and stop!
If you have any trouble with the layers moving, use THIS STUFF to keep the backing and batting layers smushed together properly. It works really great as a basting spray. I don't like to pin these since I want them to lay as flat as possible... It's a lot of layers after all.
If you need to, trim the layers so that they are even all around.
Trim off the corners. Don't be dumb and cut through your stitching line... I would never, ever, ever do something that silly... ever.... (this is dripping with sarcasm if you couldn't tell... ha!)
Turn right side out through your opening.

Use a pencil or screw driver, or some other fancy tool to push out your corners.

Make your opening "behave" and give the whole thing a press with a heavy iron.
Then, using matching (or coordinating) threads on both top and bottom, top stitch all the way around at a very scant 1/4" seam allowance. It has to be SMALLER than the seam allowance you used to assemble these. You want that opening and the inside seam to be caught in your top stitch.

here's the opening.... If it didn't lay so neatly (which happens a lot) Go back with a needle and whip stitch it closed.... or not.... up to you! This one turned out pretty good... It think it knew it would be on camera!

Next, give a quick little stitch in the ditch around your four patch unit so that you can officially say you have made a QUILTED coaster. Finish the other 3 to complete your set.

Cute, right?!
I use these for gifts quite a bit. Makes for a quick and easy housewarming, or hostess gift, or to put around the house!
DISCLAIMER: these are not water proof.... They are really absorbent, but the bottoms will be damp. I would not use them on a piece of furniture that will stain from water rings. Use only on surfaces that are not old wood finishing.
You could add a layer of vinyl or plastic, to make them more water proof, but I'm not using them on anything antique so... there you go.

I expect there to be no shortage of coasters after this month!
😏😏😏
No comments:
Post a Comment